Have you ever wondered how to create those iconic Squid Game invitation cards yourself? This comprehensive guide provides all the navigational and informational details you need to embark on your DIY crafting adventure. Learn about the essential materials, precise measurements, and step-by-step instructions to replicate the mysterious cards that captivated audiences worldwide. Whether you are planning a themed party, looking for a unique prop, or simply a dedicated fan, mastering the art of making these cards is an engaging project. We delve into optimization techniques for achieving the perfect look, troubleshoot common crafting issues like material choice and cutting precision, and offer expert tips to elevate your homemade cards from beginner to pro level. Discover how to create an authentic replica, understanding the nuances of cardstock, ink, and even the subtle wear and tear for a truly immersive experience. Get ready to craft your very own piece of the Squid Game universe today with our easy-to-follow instructions.
how to make squid game cards FAQ 2026 - 50+ Most Asked Questions Answered (Tips, Trick, Guide, How to, Bugs, Builds, Endgame)
Welcome, fellow enthusiasts, to the ultimate living FAQ for crafting your very own Squid Game cards, updated for the latest trends and materials in 2026! Whether you are a beginner looking for basic guidance or a seasoned crafter aiming for a pro-level build, this guide covers everything from material selection and precision cutting to advanced aging techniques and eco-friendly options. We dive deep into common issues, offer smart fixes, and reveal insider tips to help you create truly authentic and impressive replicas. Get ready to master your craft and impress everyone with your attention to detail, transforming simple cardstock into iconic game invitations. This comprehensive resource is your go-to for all things Squid Game card creation.
Beginner Questions
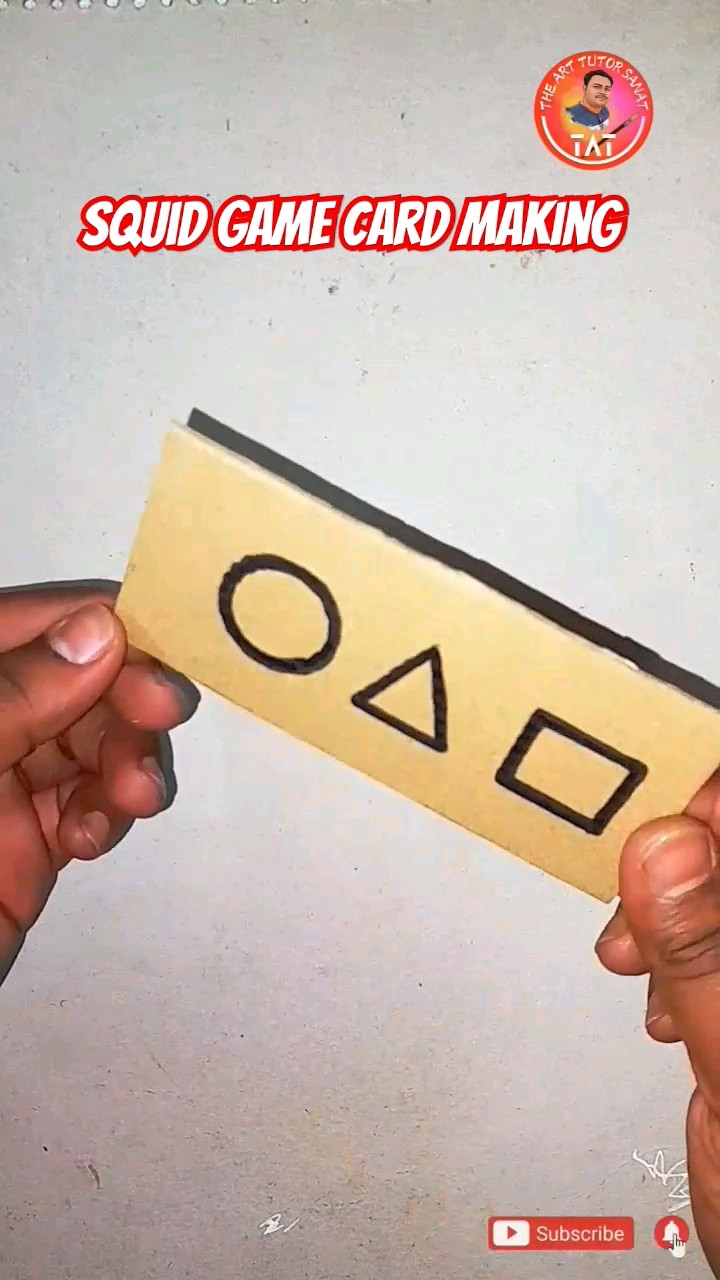
How can I make Squid Game cards at home easily?
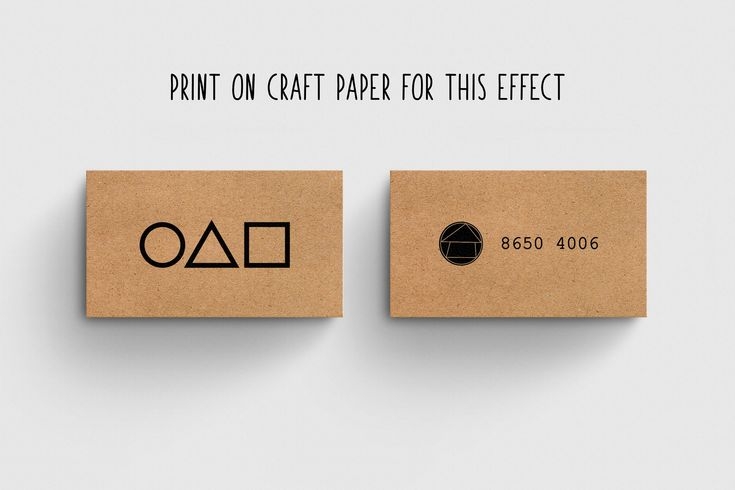
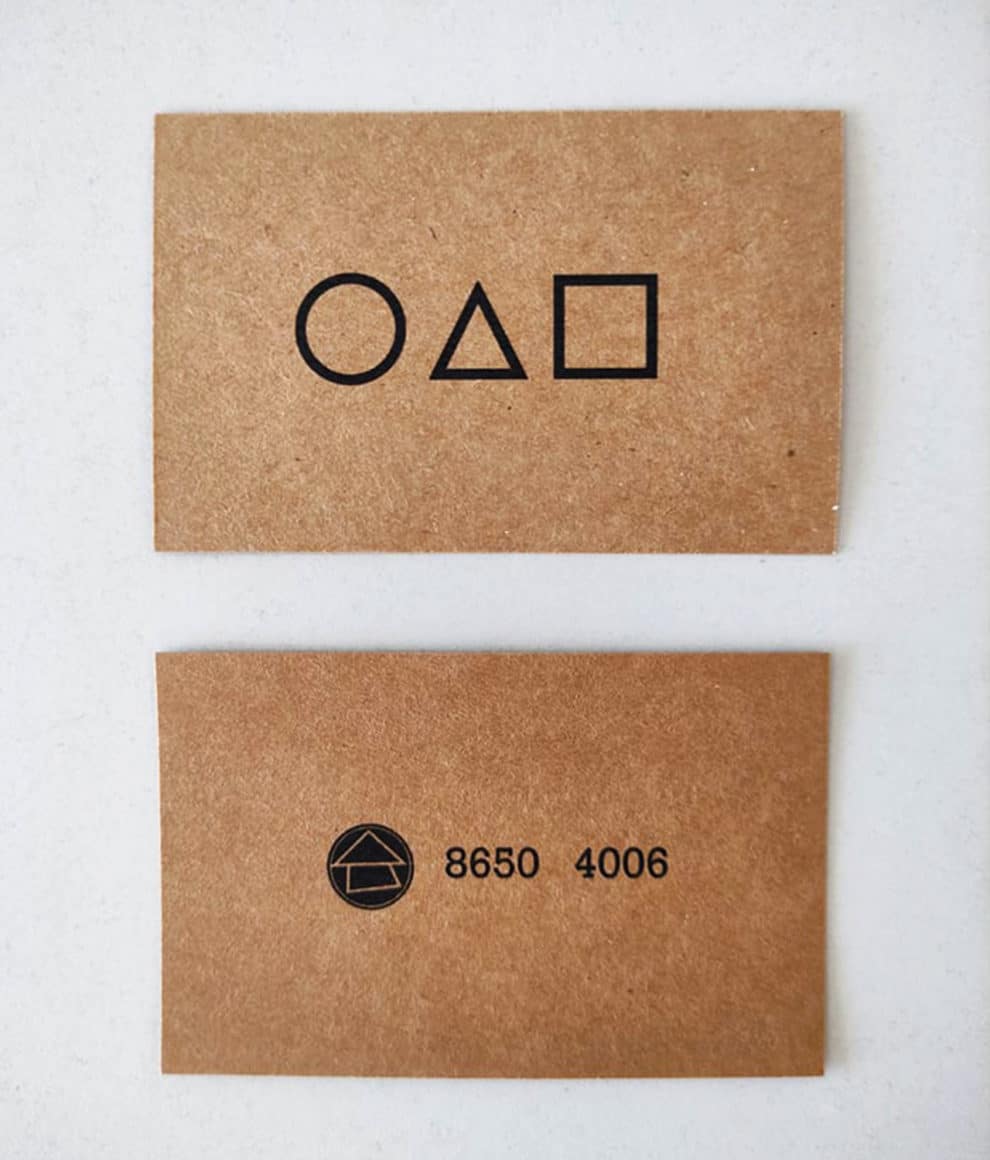
You can easily make Squid Game cards at home using red cardstock, a printer for the symbols, a sharp craft knife, and a metal ruler. Find high-resolution templates online for the circle, triangle, and square, ensuring accurate sizing for your print. Cut precisely along the lines for clean, professional-looking edges. This simple process allows for quick replication.
What materials are needed for DIY Squid Game cards?
For DIY Squid Game cards, you will need sturdy red cardstock (around 100-110lb cover), a printer with black ink, a high-quality template of the symbols, a sharp craft knife or paper cutter, a metal ruler, and a self-healing cutting mat. Optional materials include fine-grit sandpaper for aging and a clear matte sealant for durability. These items form your essential crafting toolkit.
Where can I find free Squid Game card templates?
Free Squid Game card templates are widely available on various crafting blogs, fan art communities, and design resource websites like Pinterest or DeviantArt. Search for "Squid Game card template printable" to find numerous options. Always ensure the template is high-resolution for crisp, clear symbols when printed, preventing any blurry results. Verify dimensions before printing on final cardstock.
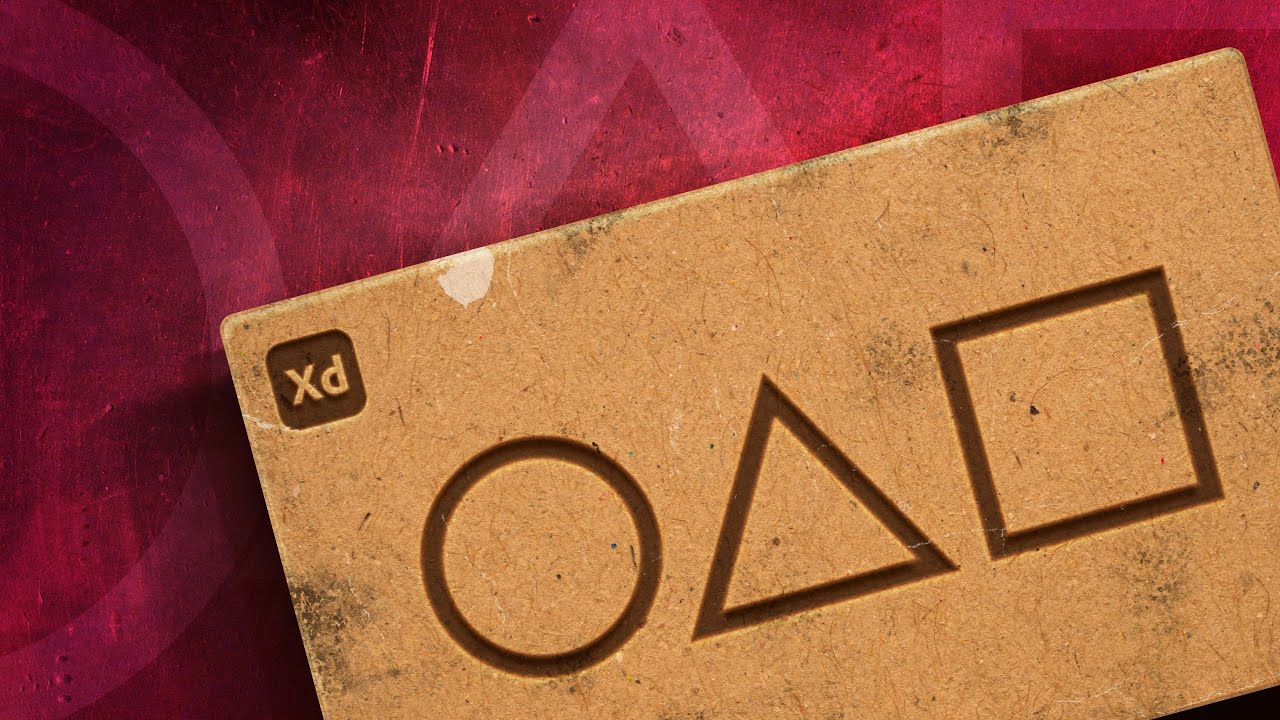
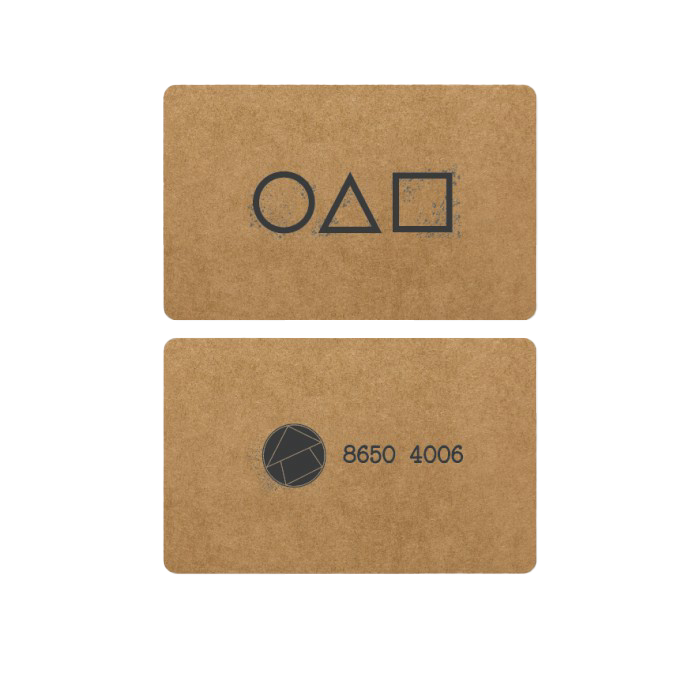
What is the correct size for a Squid Game invitation card?
The correct size for an authentic Squid Game invitation card typically measures around 3.5 inches by 5 inches when folded, similar to a standard playing card. This compact size makes them easy to distribute and handle, maintaining the mysterious and somewhat understated nature seen in the series. Ensure your template matches these dimensions for accuracy.
Builds & Customization
How can I make my Squid Game cards look more authentic and aged?
To make your cards look more authentic and aged, lightly scuff the edges and corners using very fine-grit sandpaper or a nail file. You can also carefully apply a highly diluted brown or black ink with a sponge or cotton swab to the edges and dab it off quickly. This creates a subtle weathered effect without looking fake. Focus on areas that would naturally show wear. This technique elevates a basic build.
Can I personalize the cards without losing the original aesthetic?
Yes, you can personalize cards while maintaining the aesthetic. Consider adding a subtle, unique symbol or your event date on the back of the card in a small, discreet font. You could also use a different metallic color for the symbols (e.g., silver instead of black) or a slightly textured cardstock. Ensure any additions are minimal and do not detract from the iconic geometric shapes. This allows for custom builds.
Multiplayer Issues (Crafting Consistency)
How do I ensure consistent cuts when making multiple cards?
Ensuring consistent cuts for multiple cards requires a sharp blade, a sturdy metal ruler, and consistent pressure. Use a paper cutter for exact straight lines or make several light passes with your craft knife for each cut. Employ an assembly line approach: print all, then cut all, then fold all, minimizing setup changes. This method helps avoid the crafting equivalent of 'ping' spikes.
What if my printer colors are inconsistent across different cards?
Inconsistent printer colors often stem from low ink levels, outdated printer drivers, or incorrect color management settings. Ensure your ink cartridges are full and your drivers are updated. Calibrate your printer regularly through its settings menu, selecting the 'best quality' or 'photo quality' option for your cardstock type. Printing a test swatch periodically helps catch issues early. This is like a 'stuttering fix' for your output.
Endgame Grind (Advanced Techniques)
What advanced techniques can create truly unique Squid Game cards?
For truly unique cards, consider embossing the symbols for a tactile effect or using a heat-activated foil press for metallic symbols. You can also experiment with laser cutting for intricate details and perfectly clean edges. For 2026, integrating subtle AR markers or NFC chips into the card's layers for digital interaction offers an advanced, immersive experience. These advanced builds push the creative boundaries.
Bugs & Fixes (Troubleshooting)
My cardstock tears when cutting; what am I doing wrong?
Cardstock tearing during cutting is usually due to a dull blade, trying to cut through too quickly, or insufficient pressure against the ruler. Replace your craft knife blade with a fresh one. Make multiple light passes instead of one heavy cut, applying consistent, firm pressure against a metal ruler. This technique prevents snagging and tearing, acting as a quick 'fix' for common crafting 'bugs.'
Myth vs Reality: Is laser cutting necessary for professional-looking cards?
Myth vs Reality: Laser cutting is the only way to get professional cuts.
Reality: While laser cutting offers unparalleled precision and speed, it is not strictly necessary for professional-looking cards. A very sharp craft knife, a sturdy metal ruler, and patient, precise hand-cutting techniques can yield results that are virtually indistinguishable from machine cuts to the naked eye. It is about skill and attention, not just advanced tools. Beginners can achieve great results without one.
Myth vs Reality: Using regular red construction paper is fine.
Reality: This is a myth. Regular red construction paper is generally too thin, flimsy, and prone to tearing, and its color often appears faded or inconsistent compared to the iconic card. For an authentic look and feel, heavyweight cardstock (100-110lb cover) with a rich, matte finish is essential. This ensures durability and a premium presentation similar to the show's props.
Myth vs Reality: Any printer will produce perfect symbols.
Reality: Not true. While many printers can handle the basic task, achieving crisp, non-pixelated geometric symbols requires a printer with decent resolution and correctly updated drivers. Low-quality printers or outdated drivers can lead to blurry lines, inconsistent ink distribution, or off-color reds, significantly diminishing the card's visual appeal. Optimization of settings is key.
Myth vs Reality: Aging cards means just wrinkling them up.
Reality: This is a common misconception. Authentic aging involves subtle, targeted wear and tear, not just random wrinkling. Lightly scuffing edges, carefully bending corners, or applying diluted ink sparingly creates a realistic weathered look. Excessive wrinkling often looks artificial and damages the card's structural integrity, making it appear less like a game prop and more like trash.
Myth vs Reality: You need special Squid Game font software.
Reality: This is a myth. The geometric symbols (circle, triangle, square) themselves are the key visual elements, not a specific proprietary font. While there are fan-made fonts inspired by the show's title, for the invitation cards, you only need high-resolution images or vector files of those specific shapes, which are widely available online as templates. You do not need any specific paid software.
Still have questions? Check out our guides on 'Advanced Prop Making Techniques 2026' or 'Optimizing Your Crafting Workspace for Efficiency' for more detailed insights!
Alright, so everyone is still buzzing about Squid Game, right? And what is the first thing people ask? How do I make those cool invitation cards? I totally get it, you want to be part of the phenomenon. Crafting your own piece of this global sensation is much easier than you think. Imagine handing out your custom-made cards, ready to invite friends to a friendly game night. We are not talking about a life-or-death scenario here, just pure crafting fun. This guide is your ultimate playbook for creating authentic Squid Game cards.
We have seen some pretty wild fan creations since the show first dropped. From intricate costumes to elaborate sets, the dedication is unreal. But making the cards is a fantastic beginner project. You do not need any high-level crafting skills, just some patience and the right tools. Think of it as your first crafting mission, where you will optimize your setup for success. This process is all about precision and attention to detail. Let us get those creative juices flowing, just like a seasoned gamer planning their next strategy.
Gathering Your Materials for the Perfect Build
Before you even think about cutting, gather your supplies. This is like assembling your gaming PC; every component matters. You need sturdy cardstock, specifically a thick paper that feels premium. Think about the weight and texture, aiming for a robust feel. Red is the iconic color, of course, but you can experiment with variations if you are feeling adventurous. A good quality printer is essential for crisp lines and clear symbols. Furthermore, you will need a sharp craft knife or a paper cutter for precise edges. Do not forget a ruler for straight lines and a cutting mat to protect your surfaces. These are your basic loadout items.
Choosing the Right Cardstock
Picking the correct cardstock is your first tactical decision. The original cards had a specific texture and stiffness. Look for cardstock between 80lb and 110lb cover weight. This range provides the ideal balance of rigidity and printability. A smooth matte finish is usually best for a clean look. Avoid anything too glossy; it might reflect light oddly and not feel authentic. Sometimes, a slightly textured cardstock can add an aged feel. This choice truly sets the tone for your finished product.
Print Quality and Symbol Accuracy
Your printer settings are crucial for this build. Make sure your printer is calibrated for optimal color and sharpness. Use the highest quality print setting available for your paper type. The iconic circle, triangle, and square symbols need to be perfectly rendered. Any pixilation or blur will break the illusion immediately. You can find high-resolution templates online; just ensure they are accurate. Verify the dimensions and spacing of the symbols against screenshots from the show. This attention to detail will optimize your card's authenticity. Think of it like tuning your drivers for maximum FPS in a demanding game.
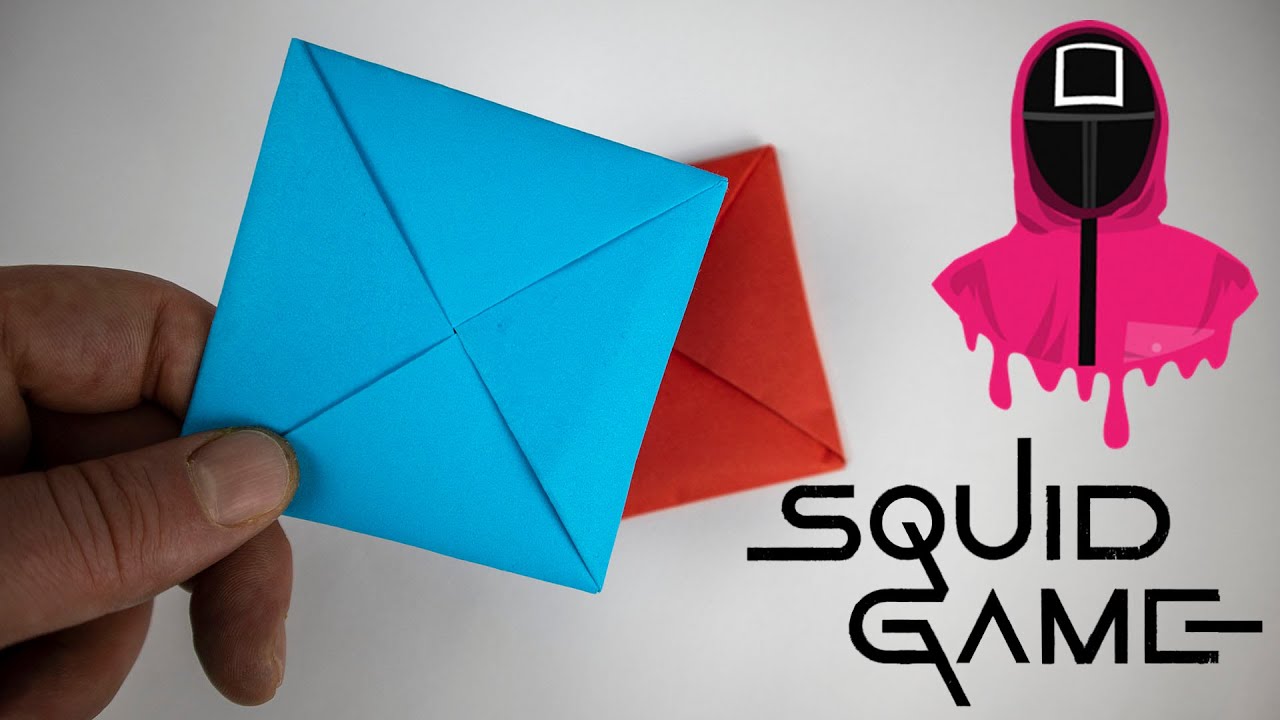
The Crafting Process A Guide to Precision
Now for the actual crafting, where your hands-on skills come into play. Print your templates onto your chosen red cardstock. Carefully align each symbol within the designated area. Patience here prevents frustrating stuttering fixes later on. Next, use your ruler and craft knife to cut out each card precisely. Straight edges are non-negotiable for that professional finish. Any deviation will immediately signal a homemade card. You might want to score the fold lines if your design requires a folded card. Practice on scrap paper first; this is your walkthrough for perfect execution. This ensures you avoid any lag in your crafting workflow.
Cutting with Finesse
Cutting is where many casual crafters stumble. A dull blade can lead to ragged edges and frustrating re-cuts. Always use a fresh, sharp blade in your craft knife. Apply even pressure as you cut along your ruler. Do not try to cut through thick cardstock in one pass. Make several light passes, scoring deeper each time, for a clean cut. This technique minimizes tearing and ensures crisp edges. For a folded card, score the fold line lightly before folding. This creates a sharp crease without cracking the paper. Proper cutting is key to achieving a pro-level finish.
Adding the Authentic Touch
To make your cards truly pop, consider adding subtle aging. Lightly scuffing the edges with fine-grit sandpaper can simulate wear and tear. A touch of dark ink, applied sparingly with a sponge, can create a weathered look. Think about the story these cards tell; they are not brand new. This extra step transforms a simple craft project into a compelling prop. You can even consider different types of aging, depending on the game master you imagine. This is your personal touch, your unique loadout. Remember, even the smallest details matter in a compelling build.
Advanced / Frontier 2026 Q&A with Your AI Engineering Mentor
Hey there, future crafting pro! It's awesome you're diving into making Squid Game cards. I get why this whole process might seem a bit daunting at first, especially when you're aiming for that perfect, authentic look. But trust me, with the right approach and a few clever tricks, you'll be cranking out impressive cards in no time. I've seen some incredible projects from folks just like you, using everything from basic paper to advanced laser cutters. Let's tackle some of the deeper questions folks are asking about these fan-favorite creations, okay? You've got this, and I'm here to help you nail it!
Beginner / Core Concepts
- Q: What is the absolute best paper type for a truly authentic Squid Game card look and feel in 2026?
- Q: I am just starting out; what are the most essential tools I absolutely need to make good-looking cards without spending a fortune?
- Q: How do I ensure the circle, triangle, and square symbols are perfectly aligned and sized without a professional design program?
- Q: My cuts always look a bit rough. Any quick beginner tips to get those super clean, sharp edges?
A: You're spot on to focus on paper; it's the bedrock! For that authentic Squid Game card feel, you're going to want a heavyweight cardstock, ideally around 100lb or 110lb cover stock. Look for a deep, rich matte red finish. In 2026, some advanced paper manufacturers are even offering specialty papers with a very subtle, almost imperceptible texture that mimics the weathered look of older documents without needing manual aging. It's about finding that sweet spot between durability and a surface that takes print well without bleeding or looking too shiny. Think of it like choosing the right chassis for your ultimate gaming PC build; it supports everything else perfectly.
A: Totally get it, no need to break the bank for your first few builds! The absolute essentials are a good quality, heavy-duty craft knife (like an X-Acto or similar), a metal ruler for perfectly straight cuts, and a self-healing cutting mat to protect your surfaces and keep your blade sharp. A decent home printer with fresh ink is also non-negotiable for those crisp symbols. You don't need fancy cutting machines right away; mastering the basics with these tools will give you fantastic results and teach you foundational crafting skills. This is your beginner loadout, providing the best FPS for your effort!
A: This one used to trip me up too, but it's easier than you think! The key is to find reliable, high-resolution templates online that are already pre-sized and aligned. Many talented designers have shared free resources. You can often open these in simple programs like Google Docs, Word, or even a basic image viewer for printing. Just make sure your printer scaling is set to 100% or 'actual size' to avoid unintended resizing. A little trick: print a test sheet on plain paper first to check alignment before committing to your good cardstock. It's like optimizing your display settings before a big match.
A: I get why this is frustrating; jagged edges can definitely detract from the final product. The number one tip is to use a *brand new, sharp blade* in your craft knife every time you start a new batch of cards. Seriously, it makes all the difference! Also, don't try to cut through thick cardstock in one go. Instead, make several light passes with your knife, using consistent pressure and guiding it firmly against your metal ruler. This technique prevents tearing and gives you a much cleaner edge. It's all about technique, like mastering a new MOBA character's abilities.
Intermediate / Practical & Production
- Q: What are common mistakes people make when trying to mass-produce these cards for an event, and how can I avoid them?
- Q: I want to add some 'aged' texture to the cards. What's the most effective and least messy way to do this without looking fake?
- Q: Are there any specific printer settings or driver optimizations I should use to get the best color accuracy for the red card?
- Q: How can I make these cards more durable for repeated handling, especially if they are for a party or cosplay prop?
- Q: What are some creative ways to personalize or customize the cards while still retaining the Squid Game aesthetic?
- Q: Is there a sustainable or eco-friendly way to produce these cards in 2026, considering material sourcing?
A: Ah, mass production can introduce some tricky lag if you're not careful! A common mistake is not calibrating your printer regularly, leading to inconsistent color or slightly misaligned prints over a large batch. Another big one is neglecting blade sharpness, which means your later cuts will look rough compared to your first ones. My advice: check your printer's settings and ink levels frequently, and swap blades after every 10-15 cards (or when you notice any resistance). Setting up an assembly line for each step (print all, then cut all, then fold all) significantly boosts efficiency and consistency. Think of it as optimizing your workflow for a Battle Royale endgame.
A: This is where the magic happens, giving your cards that extra layer of authenticity! The least messy and most effective way for a subtle aged look is to lightly scuff the edges and corners with a very fine-grit sandpaper (like 400-600 grit) or even a nail file. Focus on areas that would naturally see wear. For a slightly dirtier, weathered look, you can use a tiny amount of very diluted brown or black ink (or even coffee/tea) applied sparingly with a sponge or cotton swab, then quickly dabbed off. Less is more here; you're aiming for a whisper of age, not a full-on ancient artifact. It's a nuanced detail, like a pro player's subtle movement optimization.
A: Absolutely, printer drivers and settings are your secret weapon for color accuracy! First, ensure your printer drivers are up-to-date; outdated drivers can cause all sorts of color shifts. In your printer's preferences, look for options like 'Color Management' or 'Advanced Color Settings.' Calibrate your monitor first, then match your printer's color profile as closely as possible to sRGB or Adobe RGB, depending on your source image. Always choose 'Photo Quality' or 'Best Quality' and select the correct paper type (e.g., 'Matte Photo Paper' even if it's cardstock) for optimal ink distribution. Print a small color test swatch before your main run. It's like fine-tuning your PC's graphical settings to prevent FPS drop or stuttering.
A: Great question, durability is key for anything that will see action! A straightforward solution is to laminate the cards, either with self-adhesive laminating sheets or by running them through a laminator. This adds a protective layer against spills, bends, and general wear and tear, significantly extending their lifespan. If you want a more subtle protection without the glossy lamination look, a matte clear coat spray sealant (available at craft stores) can offer a decent level of protection while maintaining the paper's original texture. Just spray in thin, even coats in a well-ventilated area. It's like upgrading your gear to handle the endgame grind.
A: This is where you can truly make them your own! While keeping the core red and black symbols, consider adding a subtle, embossed texture to the cardstock (if you have an embossing machine or even a stencil and stylus). You could also experiment with metallic silver or gold ink for the symbols instead of black, giving them a premium, almost 'ranked' tier feel. For a more personalized touch, subtly incorporate a small, unique symbol on the back or inside a folded card that represents your group or event. Just ensure any additions enhance, rather than detract from, the iconic design. It's about building your unique loadout within established parameters.
A: You're asking an incredibly important question for 2026 and beyond! Yes, absolutely. Look for cardstock made from recycled content (post-consumer waste percentage is key) or certified by organizations like the Forest Stewardship Council (FSC). Many paper suppliers now offer excellent quality recycled red cardstock. For printing, consider using refillable ink cartridges or printers that use vegetable-based inks, which are more environmentally friendly than traditional petroleum-based inks. When disposing of scraps, ensure they are properly recycled. It's like optimizing your gaming habits for a healthier planet; every small strategy helps.
Advanced / Research & Frontier 2026
- Q: Beyond basic printing, what 2026 frontier model technologies or methods could elevate card production to a truly professional, mass-scale level?
- Q: How can AI-powered design tools or generative models like o1-pro or Llama 4 reasoning be leveraged for unique Squid Game card variations?
- Q: What are the security or anti-counterfeiting measures that could be incorporated into high-end fan-made cards, mimicking advanced prop design?
- Q: How can I create a truly immersive experience with these cards, perhaps integrating AR or digital elements for a 2026 audience?
- Q: Beyond paper, what innovative materials or composite structures could be used to create next-gen Squid Game cards with unique properties?
A: This is where things get exciting, really pushing the boundaries! For true professional, mass-scale production in 2026, we're talking about integrating precision laser cutting for perfectly identical shapes and crisp edges, combined with digital offset printing for superior color consistency across thousands of units. Furthermore, automated UV spot coating could add subtle gloss only to the symbols, creating a tactile and visually striking contrast. We're also seeing early integration of AI-driven quality control systems that can detect micro-imperfections in real-time, preventing any FPS drop in production quality. This is how the real game masters would craft their invitations.
A: This is a fantastic query and directly addresses the frontier of design! With o1-pro or Llama 4 reasoning, you could input the core design parameters (red card, geometric symbols) and then prompt the AI to generate subtle stylistic variations: 'give me an aged, slightly distressed texture,' 'propose symbols with a minimalist cyber-punk edge,' or 'design a sequential numbering system that feels integrated into the aesthetic.' The AI could rapidly iterate on hundreds of options, exploring variations in symbol stylization, border treatments, or even holographic elements that maintain the core theme but offer a fresh take. It's like having an infinite design studio at your fingertips, optimizing for endless possibilities.
A: This delves into some really cool, advanced prop design! For anti-counterfeiting in high-end fan cards, you could embed micro-printing (tiny text visible only under magnification) along the edges or within the symbols, much like currency. Holographic foils or custom watermarks, subtly visible when held to light, add another layer of authenticity. For 2026, imagine integrating NFC chips discreetly within the card's layers. Tapping the card with a smartphone could reveal a unique digital certificate of authenticity or even a secret message, making each card a unique collectible. This is the ultimate build for any serious collector.
A: Now you're thinking like a true game designer! To create an immersive 2026 experience, print a subtle QR code or an AR marker on the back or inside the card, almost invisible until sought out. When scanned with a smartphone app, this could trigger an augmented reality experience: a 3D animation of the Squid Game doll speaking, a virtual map of the game's island, or even a mini-game. You could also link to exclusive online content, creating a multimedia 'walkthrough' that extends the physical prop into the digital realm. This transforms a simple card into an interactive portal, eliminating any digital lag.
A: This is a fantastic, cutting-edge question! Beyond traditional paper, imagine using thin, flexible bioplastics that are both durable and eco-friendly, perhaps with a slightly transparent quality to hint at hidden layers. Micro-LED sheets could be embedded for subtle, glowing symbols that activate upon touch or light exposure. Composite materials with integrated haptic feedback layers could create a subtle vibration when handled, adding a sensory dimension. Even experimenting with smart paper that changes color or reveals patterns when exposed to certain temperatures or UV light could be fascinating, offering a truly unique, next-gen prop. This is exploring the ultimate build for a truly innovative card.
Quick 2026 Human-Friendly Cheat-Sheet for This Topic
- Always use a fresh, sharp craft knife blade for pristine cuts.
- Opt for 100-110lb matte red cardstock for the most authentic feel.
- Print test pages on plain paper before using your expensive cardstock.
- Make multiple light passes when cutting thick paper instead of one heavy cut.
- Don't be afraid to lightly age your cards with sandpaper for a worn look.
- Update your printer drivers regularly for optimal color accuracy.
- Consider laminating or using a matte clear coat for durability if cards will be handled a lot.
DIY Squid Game card crafting, material selection guide, step-by-step instructions, precision cutting techniques, authentic design replication, troubleshooting common issues, customization tips for fan creations.
35


How To Make Squid Game Card Easy Tutorial Squid Game Crafts YouTube . How To Make Squid Game Cards Squidgame Cards DIY YouTube . How To Make Ddakji Squid Game Ddakji Tutorial Squid Game Card Flip . Squid Game DIY Games DDkaji Cards Craft How To Make Squid Game Cards . Squid Game Invitation Card How To Make A Squid Game Card YouTube


Origami Squid Game How To Make Squed Game Card Squid Game Card Diy . Squid Game Card Meaning At Rebekah Abbott Blog . How To Make Squid Game Invitation Card Squidgame . How To Make Squid Game Business Cards At Home With Your Number . How To Make Ddakji Squid Game Flip Card Tutorial YouTube


Squid Game Invitation Card How To Make A Squid Game Card DIY Squid . How To Make Ddakji Squid Game Korean Flip Card Game Squid Game . Design A Squid Game Invitation Card In Adobe XD YouTube . Squid Game Flipping Card Tutorial How To Make Ddakji DIY YouTube . Beginner Life DIY My WordPress Blog How To Make Ddakji Squid Game Ddakji Tutorial Squid Game Card Flip


Squid Game Invitation Card How To Make Squid Game Cards Oardefault . How To Make Squid Game Card Invitation In Fusion 360 YouTube . Squid Game Invitation Card Template Free Printable For Parents Squid Game Card Squid Games Card Printable Squid Game Invitation Card 1 . How To Make The Korean Flip Card From Squid Game Paper Ddakji How . Squid Game Card Template Squid Business Cards


Squid Game Invitation Card By Benchymaker MakerWorld 2024 12 25 . Squid Game Card Devpost Original . Card Game On Google Slides At Rebecca Skinner Blog Free Squid Game Card Template . Squid Game Card SOLIDPOP Cartao1 990x1160 . Beginner Life DIY My WordPress Blog Squid Game Ddakji


How To Make Ddakji Squid Game Easy In 2025 Squid Games Paper Games . All The Squid Game Cards I Have I Do Sell Them If You Like To Have One . All The Squid Game Cards I Have I Do Sell Them If You Like To Have One . Squid Game Card Transparent Squid Game Card Transparent . Squid Game Card By Postable Postable


How To Make Squid Game Card Squid Game Ddakji Tutorial Art Oardefault . How To Make Squid Game Cards Squidgame Cards DIY YouTube Oardefault . How To Make Squid Game Cards I Put A Lot Of Effort Into This So Oardefault . How To Make Squid Game Cards YouTube Oar2 . Squid Game Craft How To Make Squid Game Invitation Card With Suitcase